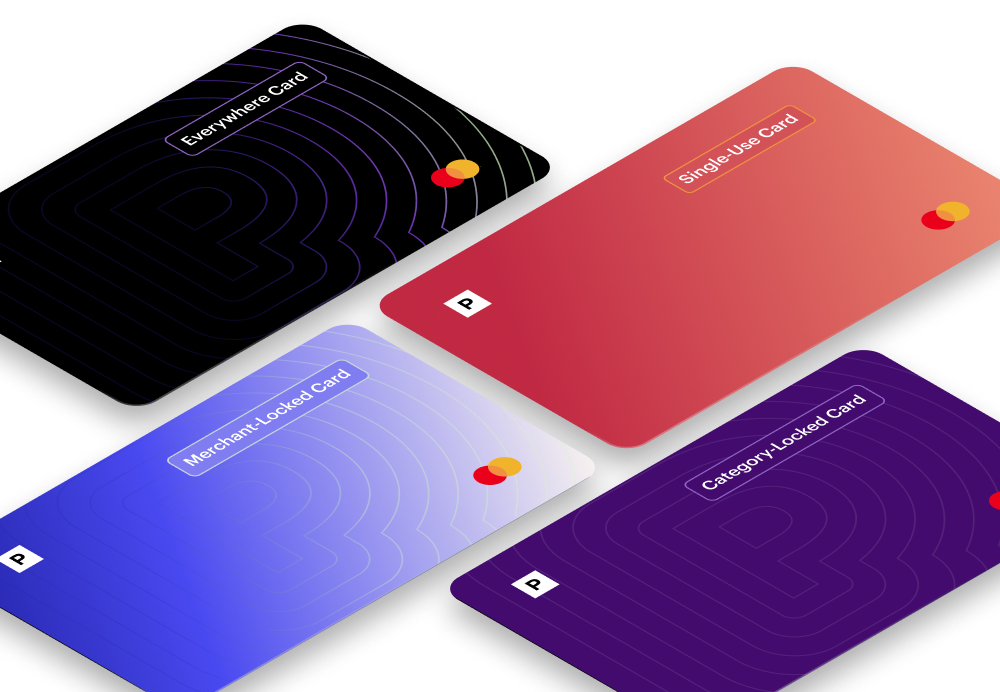
Merchant-Locked Cards
Merchant Cards lock to the first merchant you make a transaction at.
Single-Use Cards
Single-Use Cards close after the first transaction.
Category Cards
Category-Locked Cards come locked to a predefined merchant category.
Everywhere Cards
Everywhere Cards can be used in-person with mobile wallet compatibility, and don’t lock to a single merchant.
Google Play—Cancel Any Subscription With Ease
Google Play is a popular platform for Android users to download and purchase high-quality media such as apps, music, and books. The platform has over 2.5 billion active users, making it the largest app marketplace in the world. Considering the sheer number of apps in Google Play’s offering, it’s not unlikely you’ll run into some that don’t work for you.
If you’re not satisfied with one of your purchases on Google Play, you can cancel your subscription hassle-free by following the instructions in this straightforward guide. It will provide the steps required to cancel subscriptions on your smartphone or computer and offer helpful tips on how to avoid unwelcome charges from merchants and subscription services.
Note that the content in this article is current as of December 2023. Please visit the official Google Play website or contact customer support for the latest info.
How To Cancel Subscriptions on Google Play—An Overview
You can cancel a Google Play subscription whenever you want to. However, to avoid being charged again, you should cancel the subscription at least 24 hours before the next billing cycle. You'll have access to the product or service until the end of the billing cycle, but the subscription won't auto-renew.
There are two primary ways to cancel a subscription on Google Play:
- Via the Google Play app
- On the Google Play website
The following sections outline the steps you should follow for each method.
How To Cancel a Google Play Subscription via the Google Play App
You can cancel a Google Play subscription through the Google Play app by taking the steps below:
- Launch the Google Play app on your mobile device.
- Tap your profile icon in the top-right corner of the screen.
- Select Payments & Subscriptions, then Subscriptions. You can view your active and expired subscriptions in this section.
- Tap the subscription or prepaid plan you wish to cancel.
- Select Cancel Subscription and follow the on-screen prompts.
- Choose a reason for canceling from the provided options and tap Continue.
- Tap Cancel Subscription to confirm.
You should keep in mind that uninstalling the Google Play app from your device won't cancel your subscription. It’s recommended to follow the above-listed steps to stop recurring payments.
How To Cancel a Subscription on the Google Play Website
You can also cancel a Google Play subscription through the Google Play website on your computer or mobile device, including an iPhone or iPad. The process requires you to:
- Visit Google Play on your computer or mobile browser.
- Sign in to your Google account.
- Click your profile icon in the upper right corner of your screen.
- Go to Payments & subscriptions, then click Subscriptions.
- Select the subscription you wish to cancel and click Manage.
- Click Cancel Subscription.
- Select a cancellation reason within the confirmation pop-up.
- Click Continue and follow the on-screen instructions to complete your cancellation.
You should receive an email confirming cancellation, and your subscription won't renew after the current billing cycle ends.

Does Google Play Offer Refunds for Canceled Subscriptions?
Yes—according to Google Play's refund policy, you can request a refund for some Google Play subscriptions within 48 hours of purchase. You can request a refund for your subscriptions through the Google Play website or by contacting the app developer—learn the steps to follow in the table below:
Once Google Play receives your request, you’ll get an email with the refund decision. You can also check the status of your refund request on the website. If your request is accepted, you should get your money back within one to four business days.
Why Virtual Cards Are the Optimal Way To Pay for Your Subscriptions
Canceling subscription services can sometimes be challenging. While some companies have a straightforward cancellation process, others may resort to deceptive tactics to make it difficult for you to cancel your subscription.
Some of the methods these companies may use include requiring you to cancel through customer support, using guilting or unclear language in the online cancellation funnel, and making the cancellation link so inconspicuous that you end up missing it. You may even complete all the required steps to end your subscription but still be charged again the following month by mistake.
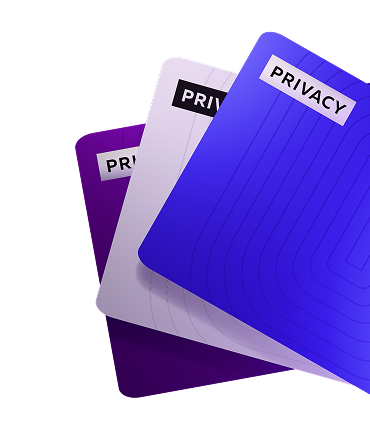
One way to avoid or limit unexpected charges is to use Privacy Virtual Cards. Virtual cards are linked to your debit card or bank account but mask your financial information with random card numbers at checkout, protecting it from potential misuse. Leading virtual card providers like Privacy also offer advanced card settings that allow you to control your online spending, making them perfect for your subscription payments, whether for Microsoft services such as Xbox Game Pass, publications like the Wall Street Journal and the New York Times, or Apple services like Apple TV.

Regain Control Over Your Online Spending With Privacy
You can connect your bank account or debit card with Privacy and start generating virtual cards to pay for your subscriptions. These cards can be used at most U.S. merchants and websites that accept U.S. Visa® or Mastercard® payments, including Amazon Music, LA Fitness, and Tinder Gold.
Privacy lets you generate two types of virtual cards—learn more about them in the table below:
Privacy also lets you pause or close and set spending limits on your virtual cards without impacting the linked funding source, giving you greater control over your subscription payments. Find out more about these features in the following section:
- Pausing/closing—You can pause or close your virtual card in a few clicks, and Privacy will decline all charge attempts on said card. This setting is especially helpful when you want to stop subscriptions because it allows you to deal with cancellations without worrying about unwelcome charges.
- Spending limits—When you set a spending limit on your virtual card, Privacy declines all exceeding transactions. Thanks to this feature, you can reduce the risk of any extra fees and double subscription charges sneaking through.
How To Set Up Privacy
To start using Privacy, complete the following steps:
- Sign up
- Provide the details needed to verify your identity
- Link your bank account or debit card
- Request your virtual cards
You can choose from three plans. The Personal plan is free for domestic purchases and lets you create up to 12 virtual cards per month. This plan includes features such as card pausing or closing, spending limits, and access to the Privacy Browser Extension and mobile app.
The Privacy Browser Extension enables fast and seamless checkouts by auto-populating virtual card details at checkout so you don't have to reach for your wallet whenever you shop. You can download the extension for Edge, Firefox, Chrome, and Safari, as well as Safari iOS if you’re using an iPhone or iPad. The Privacy mobile app, available for Android or iOS, lets you create and manage your virtual cards on the go.
You can get the Pro ($10/month) or Premium ($25/month) plan if you need more cards (up to 60 per month) and features such as:
- Priority support
- Fee-free international transactions
- 1% cashback on eligible purchases (totaling up to $4,500/month)